728x90


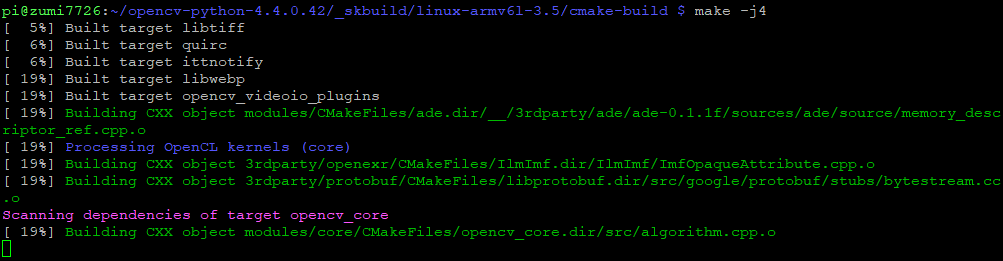
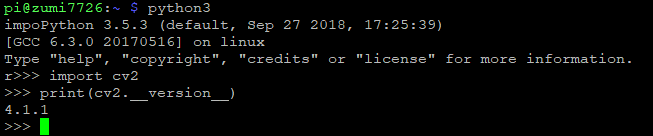
원래 주미에는 opencv 3.4.3(?) 버전이 설치되어있는데


이상하게 피처 매치 부분에서 계속 버그가 나더라


아무리 삽질해봐도 도저히 고칠수 없어서 다른 버전을 사용하려고 했다.


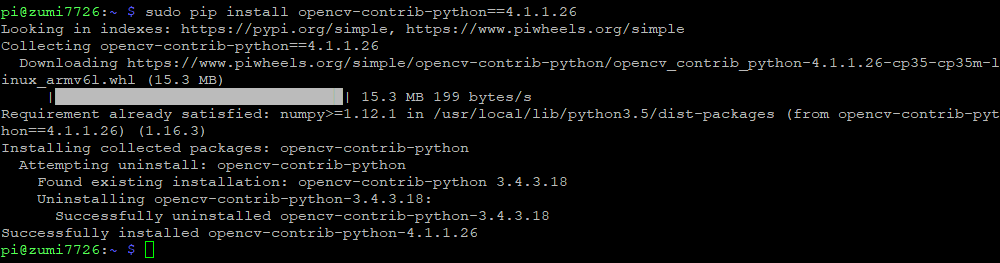
그래서 opencv를 업그레이드 하겠다고 한참 삽질을 하다가
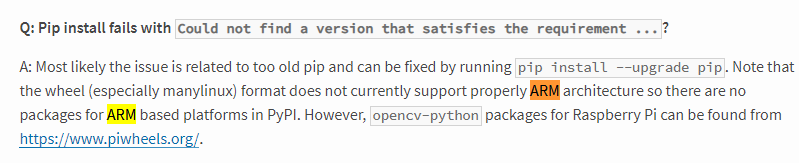
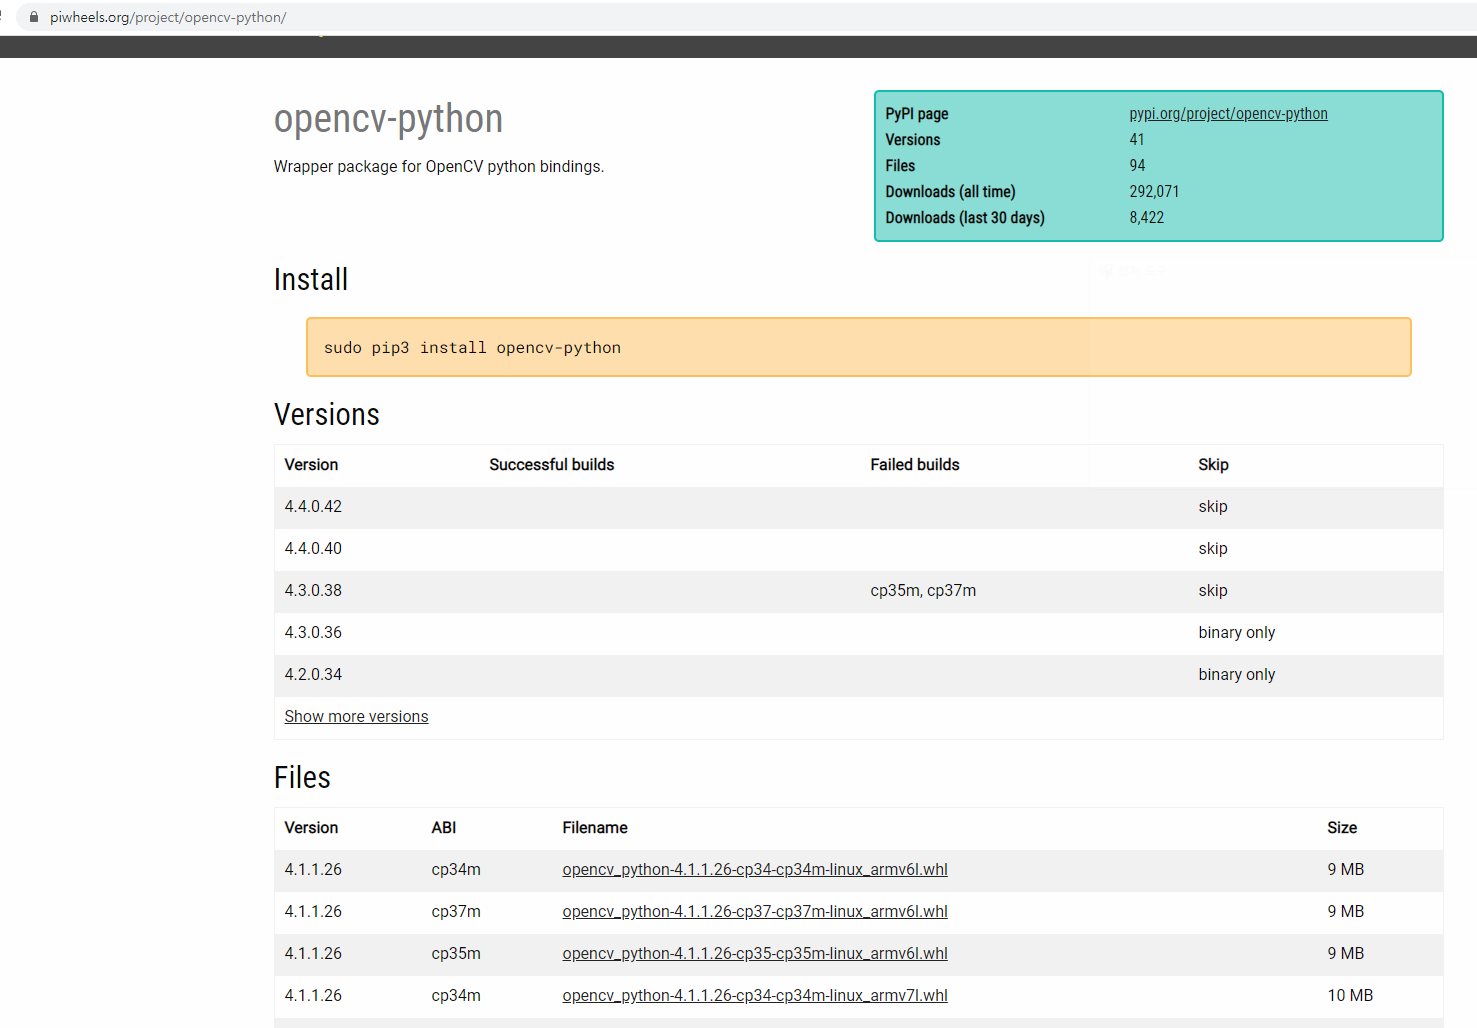
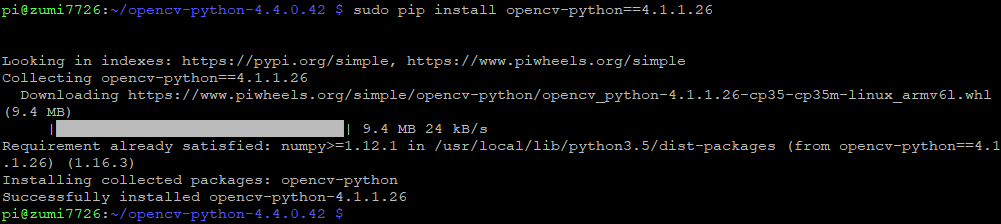
 

whl 파일 설치해서 마무리하고


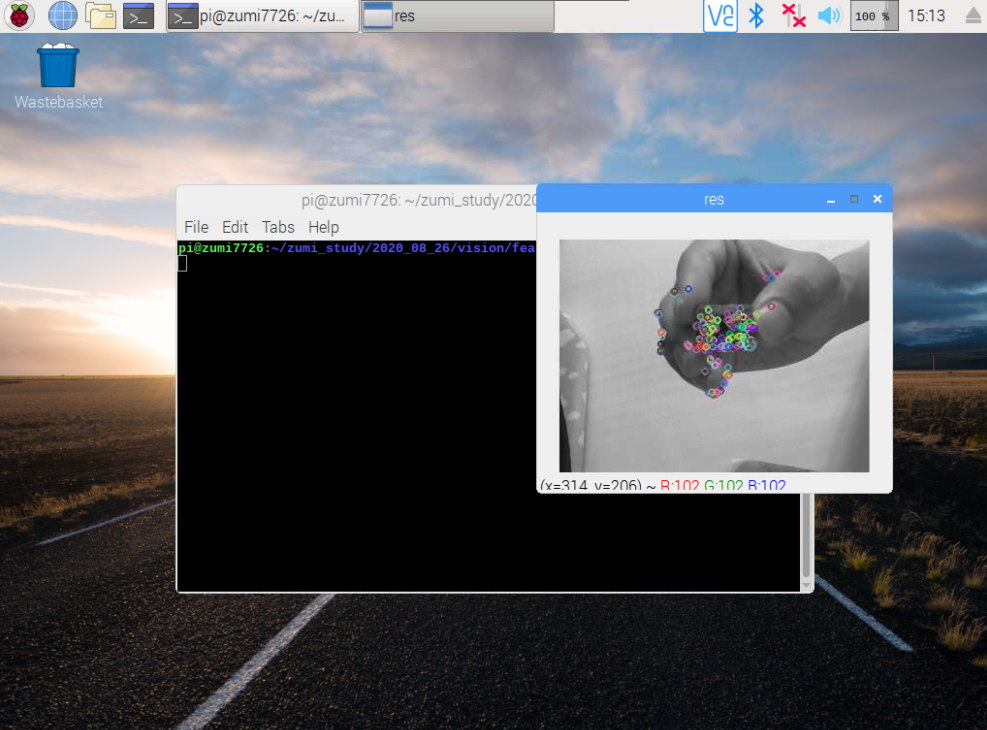
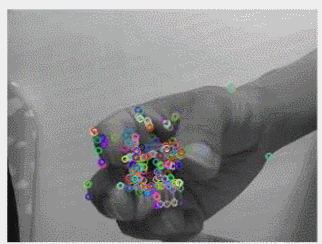
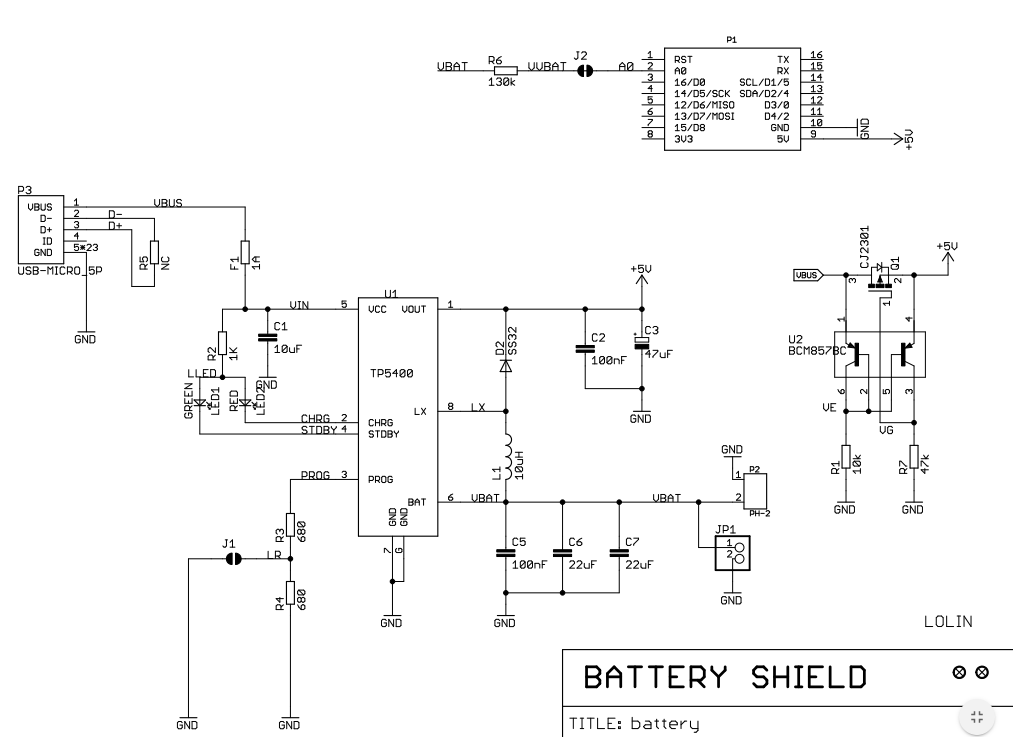
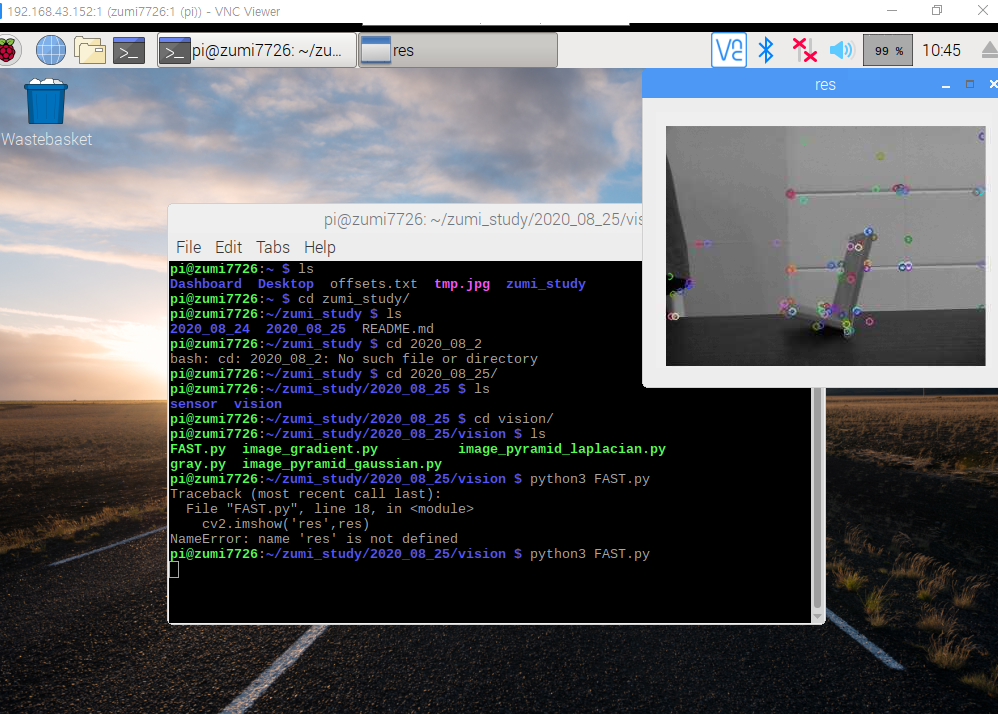
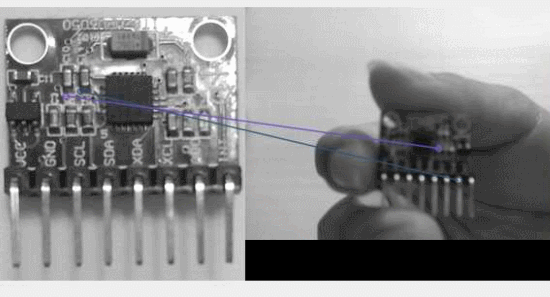
다시 ORB 특징을 이용한 MPU6050 피처 매치


좌측의 센서 사진은 그냥 폰으로 찍어서 사용했다.


import numpy as np
import cv2

cap = cv2.VideoCapture(0)


#queryImg
#qImg = cv2.imread('./res/mpu6050_2.png',0)
qImg = cv2.imread('../../../res/mpu6050_2.png',0)

# Initiate STAR detector
orb = cv2.ORB_create()
# find the keypoints with ORB
kp1 = orb.detect(qImg,None)
# compute the descriptors with ORB
kp1, desc1 = orb.compute(qImg, kp1)

# create BFMatcher object
bf = cv2.BFMatcher()
print(len(desc1))

while(True):
    ret, frame = cap.read()
    frame = cv2.flip(frame, 0)
    rsz = cv2.resize(frame, dsize=(320,240))
    gray = cv2.cvtColor(rsz, cv2.COLOR_BGR2GRAY)

    # find the keypoints with ORB
    kp2 = orb.detect(gray,None)
    # compute the descriptors with ORB
    kp2, desc2 = orb.compute(gray, kp2)

    # Match descriptors.
    matches = bf.knnMatch(desc1,desc2, k=2)
    # Apply ratio test
    good = []
    for m,n in matches:
        if m.distance < 0.75*n.distance:
            good.append([m])


    gray = cv2.drawMatchesKnn(qImg,kp1,gray,kp2,good, None, flags=2)


    cv2.imshow('res',gray)
    if cv2.waitKey(20) & 0xFF == ord('q'):
        break

cap.release()
cv2.destroyAllWindows()


300x250
728x90

라즈베리파이에 영상처리를 한다면


opencv 소스를 직접 다운 받고, 설정, 빌드, 인스톨까지 해야되지만


빌드하는데 시간이 너무 오래걸린다..


그런데 이번에 whl 파일이 빌드 하지 않고 사용할수 있게 만든 실행 파일이고,


PyPi가 whl, 소스를 제공하는 저장소인걸 알게 되고


arm 아키텍처에서 pip install opencv-python 할때마다 build wheel을 하니


PyPI에는 암 아키텍처용 whl 파일이 없구나 싶어


"파이썬 패키지 배포하기" 글을 보고

https://rampart81.github.io/post/python_package_publish/


pizero에서 opencv를 빌드해서 PyPi에다가 배포해보려고 했었다.


주미에게 무거운 opencv를 빌드 시킨 동안 


opencv-python 다큐먼트를 보고있었는데

ref: https://pypi.org/project/opencv-python/


ARM 아키텍처용 opencv python 파일은


PyPI이 아니라 piwheels.org에서 제공해준다고 하더라...


마침 주미에서 사용하는 python35- arm6l whl 파일이 제공되니 이걸 바로 다운받으면 된다.


https://www.piwheels.org/project/opencv-python/


piwheel 저장소 사용하는 방법은 홈페이지에 들어가면 바로 나온다.


/etc/pip.conf에 piwheels.org 주소만 등록해주면 되더라


ref : https://www.piwheels.org/


주소를 등록해주고 나니 이제서야 piwheels 저장소에서 검색하더라


그런데 시스템 에러가 발생한다. 


설치할 버전을 지정해주니 잘 설치된다.


파이썬 3.5, arm, opencv 4.1.1 설치 버전 확인해주고


opencv-contrib-python도 설치하자.


이제 번거로운 빌드는 그만해도 되겠지..?


300x250
728x90

mpu6050은 관성 센서인데


가속도계도 들어있으니


가속도로 속도를 구하고, 속도로 위치를 구할수 있을거라 생각했다.


그래서 우선 x축 가속도 값을 출력해보기도 하고


from zumi.zumi import Zumi
import time
import datetime as pydatetime

def get_now():
    return pydatetime.datetime.now().timestamp()

#initialize
zumi = Zumi()


bf_time = 0
curr_time = 0

def get_offset(zumi, sampling):
    offset = 0
    for i in range(1, sampling):
        acc = zumi.get_acc()
        accx = round(acc[0], 3)
        offset = offset + accx
    
    offset = offset/sampling
    print("offset : " + str(offset))
    return offset

def print_acc(zumi, offset):
    global curr_time, bf_time
    acc = zumi.get_acc()
    acc_x = round(acc[0] - offset, 2)
    curr_time = get_now()
    dt = round(curr_time - bf_time, 3)
    msg = "acc x : "+str(acc_x)  + ", dt : " + str(dt)
    bf_time = curr_time
    print(msg)

def do_something(zumi, offset):
    print_acc(zumi, offset)
    time.sleep(0.1)


try:
    offset = get_offset(zumi, 100)
    while True:
        do_something(zumi, offset)
except KeyboardInterrupt:
    pass


센서 데이터 특정 시간을 타임 스탬프로 출력해서


시간 구간으로 적분해보기도 했다.


더해서 LPF도 써보기는 했으나


from zumi.zumi import Zumi
import time
import datetime as pydatetime

def get_now():
    return pydatetime.datetime.now().timestamp()

#initialize
zumi = Zumi()
vel = 0
alpha = 0.7
bf_time = 0
curr_time = 0
prev_acc = 0
def get_offset(zumi, sampling):
    offset = 0
    for i in range(1, sampling):
        acc = zumi.get_acc()
        accx = round(acc[0], 3)
        offset = offset + accx
    
    offset = offset/sampling
    print("offset : " + str(offset))
    return offset


def LPF(alpha, prev, curr):
    val = alpha * prev + (1-alpha) * curr
    return val

def print_acc(zumi, offset):
    global curr_time, bf_time, vel, prev_acc
    acc = zumi.get_acc()
    acc_x = LPF(alpha, prev_acc,acc[0])
    acc_x = round(acc[0] - offset, 2)

    curr_time = get_now()
    dt = round(curr_time - bf_time, 2)
    vel = vel + acc_x * dt
    vel = round(vel, 2)
    msg = "acc x : "+str(acc_x)  + ", vel : " +str(vel)+", dt : " + str(dt)
    bf_time = curr_time
    prev_acc = acc_x
    print(msg)

def do_something(zumi, offset):
    print_acc(zumi, offset)
    time.sleep(0.1)


try:
    offset = get_offset(zumi, 100)
    bf_time = get_now()
    while True:
        do_something(zumi, offset)
except KeyboardInterrupt:
    pass


가속도계 자체 오차가 너무 심해서 


처음 초기화 당시에는 안정적이더라도


조금만 움직이고 나서는 오차가 점점 누적되어 발산하게 되버리더라


내 딴에는 나름대로는 칼만필터도 써보긴했는데 


과정은 따로 녹화는 안해서 올리진 못한게 아쉬워도 여기까지 하고


그래서 mpu6050에서 가속도계는


자이로 센서로 각 변화율을 구하는데 보조해주기만 하나보더라


300x250
728x90

많은 오픈소스들이 파이썬으로 되어있지만


파이썬 기본 문법만 이해하고 넘어갔지


프로젝트 구조에 대해서는 잘 모르고 있었다.


그러디보니 setup.py , setuptool란게 자주 보이기는 하지만 뭔진 잘  모르겠더라


찾아보면 되는데 막상 잘 찾아보지 않고 삽질만 하게 된다.


이번에 잠깐 찾은 글


파이썬 프로젝트 구조

ref : https://www.holaxprogramming.com/2017/06/28/python-project-structures/


파이썬 프로젝트 시작하기

ref : http://www.flowdas.com/blog/%ED%8C%8C%EC%9D%B4%EC%8D%AC-%ED%94%84%EB%A1%9C%EC%A0%9D%ED%8A%B8-%EC%8B%9C%EC%9E%91%ED%95%98%EA%B8%B0-setuptools/


파이썬 패키지 배포하기

ref : https://rampart81.github.io/post/python_package_publish/


300x250
728x90

ref : https://www.raspberrypi.org/blog/piwheels/


위 글은 piwheels에 대해 소개하면서


PyPi와 pip 설치가 오래 걸리는 등 이유를 설명해주고 있습니다.


지금 주미(파이 제로)에서 어쩔수 없이 pip 명령어로 opencv-python을 업그레이드 시키는 중인데


빌드 과정에서 3시간째 멈추질 않아 검색하다가 찾은 글입니다.


가끔 pip를 검색하다보면 pypi라는 사이트에 들어 가곤 했는데 배포 정보를 알려주는구나 정도만 알았지


정확하게 무슨 사이트인지는 잘 몰랐는데 이 글을 보면서 잠깐 정리하면


Python Package Index(PyPI)

- 파이썬 모듈 페키지 저장소

- 파이썬 커뮤니티에서 쉽개 배포판을 설치할수 있도록 라이브러리리들을 공개하고 있습니다.

- pip 명령어를 사용하면 이 저장소에 등록된 소프트웨어들을 다운받아 설치하게 됩니다.


pip가 오래걸리는 이유

- pip를 사용하다보면 어떤 경우는 빠르게 끝나지만 어떤 경우는 오래 걸릴때가 많습니다.

- 저장소에 python wheel 파일이 존재하는 경우 wheel 파일을 다운받아 바로 쓸수 있으나

- wheel이 없는 경우, 해당 소스 코드를 직접 빌드하게 됩니다.

- 보통 wheel파일은 32/64bit windows, macos, linux 용으로만 있지, arm 아키텍처용은 잘 없습니다.


Python Wheel

- 파이썬 패키지의 미리 빌드된 버전 배포판

- wheel 파일을 사용하면 소스코드를 다운받아 빌드할 필요가 없음


raspberry pi에서 opencv 빌드하기도 오래걸리는데


pizero에선 오죽할까.


300x250

'미분류' 카테고리의 다른 글

컴퓨터개론  (0) 2020.10.15
파이썬 프로젝트 빌드  (0) 2020.08.28
성장하는/성장이 멈춘 인재의 차이  (0) 2020.08.22
블로그에 pdf 올리기  (0) 2020.08.13
대학 수학  (0) 2020.08.10
728x90

ORB 

- FAST + Rotated BRIEF

- 고속 특징 검출이 가능하며 회전 변화에 강인


import numpy as np
import cv2

cap = cv2.VideoCapture(0)
ret, frame = cap.read()
rsz = cv2.resize(frame, dsize=(320,240))
gray = cv2.cvtColor(rsz, cv2.COLOR_BGR2GRAY)
# Initiate ORB detector
orb = cv2.ORB_create()

# find the keypoints with ORB
kp = orb.detect(gray,None)
# compute the descriptors with ORB
kp, desc = orb.compute(gray, kp)
#print("orb kp.shape : " + str(len(kp)) + ", orb desc.shape : " + str(desc.shape))


while(True):
    ret, frame = cap.read()
    frame = cv2.flip(frame, 0)
    rsz = cv2.resize(frame,dsize=(320,240))
    gray = cv2.cvtColor(rsz, cv2.COLOR_BGR2GRAY)

    # find the keypoints with ORB
    kp = orb.detect(gray,None)
    # compute the descriptors with ORB
    kp, desc = orb.compute(gray, kp)

    # draw only keypoints location,not size and orientation
    res = cv2.drawKeypoints(gray,kp,None)

    cv2.imshow('res',res)
    if cv2.waitKey(20) & 0xFF == ord('q'):
        break

cap.release()
cv2.destroyAllWindows()


300x250
728x90

지금 아두이노 벨런서를 만들면서 있는 문제들 중에


베터리가 고민된다.


그냥 AA 건전지를 연결해서 사용해도 되지만


계속 그렇게 건전지 비용을 사서 쓸수도 없고


결국에는 리튬 베터리를 사용하긴 해야하는데


베터리 관련해서 사용가능한 모듈이 없나 찾아보다가


얼마전에 받은 WeMos 키트에 베터리 쉴드가 있더라


이 베터리 쉴드로 USB 연결시 리튬 배터리를 충전할수 있다고 하니


베터리 충전용으로 사용해도 될듯 싶다.


이 외에 리튬 베터리로 아두이노를 동작시키는 방법에 대해 검색해보았는데


생각보다 간단하더라


리튬 베터리 커넥터 부분을 바로 점퍼 케이블로 아두이노에 연결하면 되니 크게 걱정안해도 될거같다.


이외에도 오늘 생각보다 진도 많이 나갔다.


원래 하려던 MPU-6050와 다른 센서에 납땜도하고


기구 제작에 가장 큰 문제가 되었던 볼트 너트 부분도


볼트는 기존대로 하고


너트는 조금 확대 시켰더니 잘 조여진다.


사진 많이 찍어놓긴 했는데 빠트리고말았다. 나중에 올려야지.


또 하필 오늘 충전기를 두고 온 탓에 주미를 많이 하지는 못했지만


대신 주미에서 사용할 영상 부분들을 실습을 꽤 진행하였다.


남은 시간에는 필터 부분을 처리하면 될듯하다.


-------------------------------------


위 베터리 쉴드 다큐먼트 페이지를 찾았다.


ref: https://docs.wemos.cc/en/latest/d1_mini_shiled/battery.html


외형은 조금 다르지만 구조는 비슷하다.


300x250
728x90

영상 특징 FAST


ref : https://opencv-python-tutroals.readthedocs.io/en/latest/py_tutorials/py_feature2d/py_fast/py_fast.html#fast

ref : https://throwexception.tistory.com/831?category=873104


import numpy as np
import cv2

cap = cv2.VideoCapture(0)
while(True):
    ret, frame = cap.read()
    frame = cv2.flip(frame, 0)
    rsz = cv2.resize(frame, dsize=(320,240))
    gray = cv2.cvtColor(rsz, cv2.COLOR_BGR2GRAY)

    # Initiate FAST object with default values
    fast = cv2.FastFeatureDetector_create()

    # find and draw the keypoints
    kp = fast.detect(gray,None)
    gray = cv2.drawKeypoints(gray, kp, gray)

    cv2.imshow('res',gray)
    if cv2.waitKey(20) & 0xFF == ord('q'):
        break

cap.release()
cv2.destroyAllWindows()


300x250

'로봇 > 로봇' 카테고리의 다른 글

zumi - 25. mpu6050 가속도계로 속도, 위치 구하기 fail  (0) 2020.08.28
zumi - 24. ORB  (0) 2020.08.27
zumi - 22. 저주파 통과 필터  (0) 2020.08.25
zumi - 21. 평균 필터  (0) 2020.08.25
zumi - 20. 실시간 mpu 플로팅  (0) 2020.08.25
728x90

간단한 1차 저주파 통과 필터


ref : https://gaussian37.github.io/autodrive-ose-low-pass-filter/


저주파 통과 필터 : 잡음 제거 + 변화 민감


from zumi.zumi import Zumi
import numpy as np
import matplotlib.pyplot as plt
from matplotlib.animation import FuncAnimation
import time

data_len = 100
sampling_len = 10
alpha = 0.5


def LPF(acc_xf_lst, sampling_len, alpha, acc_x):
    prevX = acc_xf_lst[len(acc_xf_lst)-sampling_len:len(acc_xf_lst)-1].sum()/sampling_len
    acc_xf = alpha * prevX + (1-alpha)*acc_x
    acc_xf = round(acc_xf, 3)
    return acc_xf


def data_insert(acc_x_lst, acc_x):
    acc_x_lst = np.append(acc_x_lst, acc_x)
    acc_x_lst = np.delete(acc_x_lst, 0)
    return acc_x_lst

def filter_data_insert(acc_xf_lst,  alpha, acc_x):
    acc_xf_lst = np.delete(acc_xf_lst, 0)
    acc_xf = LPF(acc_xf_lst, sampling_len, alpha, acc_x)
    acc_xf_lst = np.append(acc_xf_lst, acc_xf)
    return acc_xf_lst


def init():
    idx = 0
    acc_x_lst = np.zeros(data_len)
    acc_xf_lst = np.zeros(data_len)

    t = np.linspace(0, 1, data_len)

    while idx < data_len:
        acc = zumi.get_acc()
        acc_x = round(acc[0], 3)
        acc_x_lst = data_insert(acc_x_lst, acc_x)
        acc_xf_lst = filter_data_insert(acc_xf_lst, alpha, acc_x)
    
        idx = idx + 1
    return t, acc_x_lst, acc_xf_lst

def update(i):
    global acc_x_lst, acc_xf_lst
    acc = zumi.get_acc()
    acc_x = round(acc[0], 3)

    acc_x_lst = data_insert(acc_x_lst, acc_x)
    acc_xf_lst = filter_data_insert(acc_xf_lst, alpha, acc_x)

    ln0.set_data(t, acc_x_lst)
    ln1.set_data(t, acc_xf_lst)
    return ln0, ln1


zumi = Zumi()
t, acc_x_lst, acc_xf_lst = init()
fig, ax = plt.subplots(2,1)


ln0, = ax[0].plot(t,acc_x_lst, 'r')
ax[0].grid(True)
ax[0].set_title("acc x")
ax[0].set_ylim((-0.2,0.2))
ln1, = ax[1].plot(t,acc_xf_lst, 'g')
ax[1].grid(True)
ax[1].set_title("acc x LPF")
ax[1].set_ylim((-0.2,0.2))


ani = FuncAnimation(fig, update, frames=t, blit=True)
plt.show()


300x250

'로봇 > 로봇' 카테고리의 다른 글

zumi - 24. ORB  (0) 2020.08.27
zumi - 23. FAST  (0) 2020.08.25
zumi - 21. 평균 필터  (0) 2020.08.25
zumi - 20. 실시간 mpu 플로팅  (0) 2020.08.25
zumi - 19. 주미 에지 영상  (0) 2020.08.25
728x90

x축 가속도 데이터에 평균 이동 필터를 적용하겠습니다.


ref : https://gaussian37.github.io/autodrive-ose-average-filter/

* 필터 처리에 관하여 "칼만 필터는 어렵지 않아" 추천합니다.


평균 내는 길이를 5로 한 코드입니다.


from zumi.zumi import Zumi
import numpy as np
import matplotlib.pyplot as plt
from matplotlib.animation import FuncAnimation
import time

data_len = 100
mean_len = 5

def init():
    idx = 0
    acc_x_lst = np.zeros(data_len)
    acc_xf_lst = np.zeros(data_len)

    t = np.linspace(0, 1, data_len)

    while idx < data_len:
        acc = zumi.get_acc()
        acc_x = round(acc[0], 3)
        acc_x_lst = np.append(acc_x_lst, acc_x)
        acc_x_lst = np.delete(acc_x_lst, 0)


        acc_xf_lst = np.delete(acc_xf_lst, 0)
        mean_bf = ((mean_len - 1) / mean_len) * (acc_xf_lst[len(acc_xf_lst)-mean_len:len(acc_xf_lst)-1].sum()/(mean_len-1))
        acc_xf = round(mean_bf + 1/mean_len * acc_x, 3)
        #print("acc_x : " + str(acc_x) + ",  acc_xf : " + str(acc_xf))
        acc_xf_lst = np.append(acc_xf_lst, acc_xf)
        idx = idx + 1
    return t, acc_x_lst, acc_xf_lst

def update(i):
    global acc_x_lst, acc_xf_lst
    acc = zumi.get_acc()
    acc_x = round(acc[0], 3)
    acc_x_lst = np.append(acc_x_lst, acc_x)
    acc_x_lst = np.delete(acc_x_lst, 0)


    acc_xf_lst = np.delete(acc_xf_lst, 0)
    mean_bf = ((mean_len - 1) / mean_len) * (acc_xf_lst[len(acc_xf_lst)-mean_len:len(acc_xf_lst)-1].sum()/(mean_len-1))
    acc_xf = round(mean_bf + 1/mean_len * acc_x, 3)
    acc_xf_lst = np.append(acc_xf_lst, acc_xf)
    #print("acc_x : " + str(acc_x) + ",  acc_xf : " + str(acc_xf))
    ln0.set_data(t, acc_x_lst)
    ln1.set_data(t, acc_xf_lst)
    return ln0, ln1


zumi = Zumi()
t, acc_x_lst, acc_xf_lst = init()
fig, ax = plt.subplots(2,1)


ln0, = ax[0].plot(t,acc_x_lst, 'r')
ax[0].grid(True)
ax[0].set_title("acc x")
ax[0].set_ylim((-0.5,0.5))
ln1, = ax[1].plot(t,acc_xf_lst, 'g')
ax[1].grid(True)
ax[1].set_title("acc x average filtered")
ax[1].set_ylim((-0.5,0.5))


ani = FuncAnimation(fig, update, frames=t, blit=True)
plt.show()


평균 필터 적용시


필터 처리 후 변화에 둔감


300x250

'로봇 > 로봇' 카테고리의 다른 글

zumi - 23. FAST  (0) 2020.08.25
zumi - 22. 저주파 통과 필터  (0) 2020.08.25
zumi - 20. 실시간 mpu 플로팅  (0) 2020.08.25
zumi - 19. 주미 에지 영상  (0) 2020.08.25
zumi - 18. 주미 흑백 영상 스트리밍  (0) 2020.08.25

+ Recent posts